Showing posts with label and. Show all posts

Monday, March 3, 2014

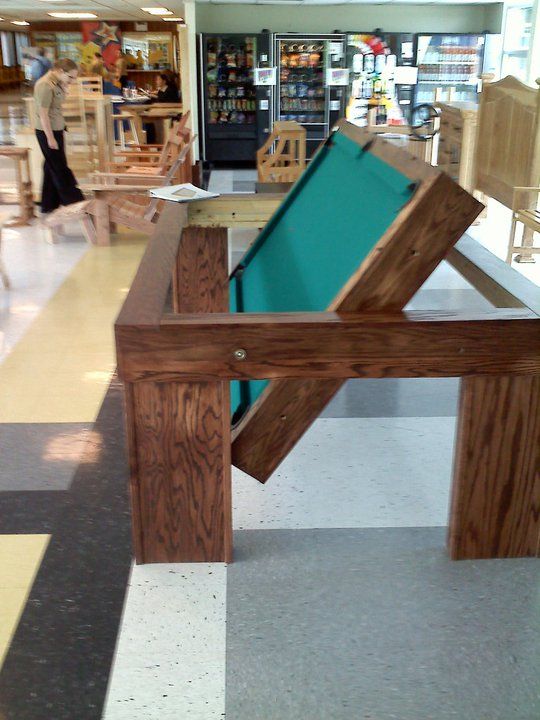
Unique viewer projects bird saw box and a convertible pool table

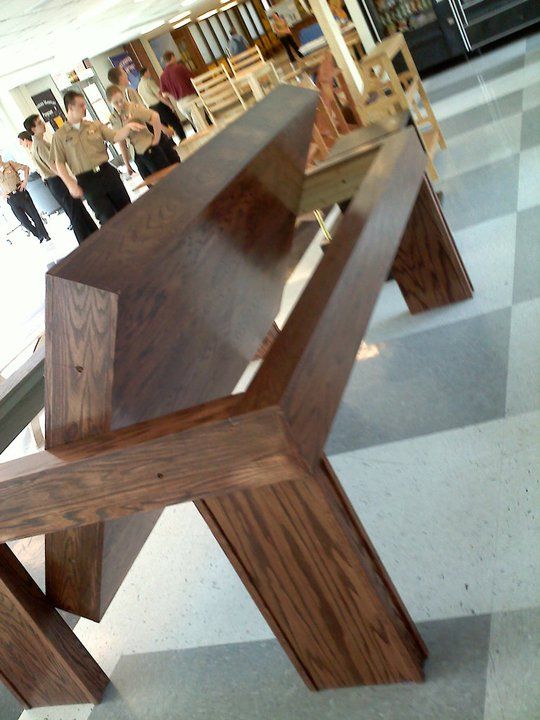
David P. from Kansas City went through a lot of research and development to build this pool table. It flips over when not in use and becomes a dining table! I dont think Ive ever seen anything like this before. David got Best in Show at his high school for this woodworking project. Hes a Junior. Wow...thats ambitious.


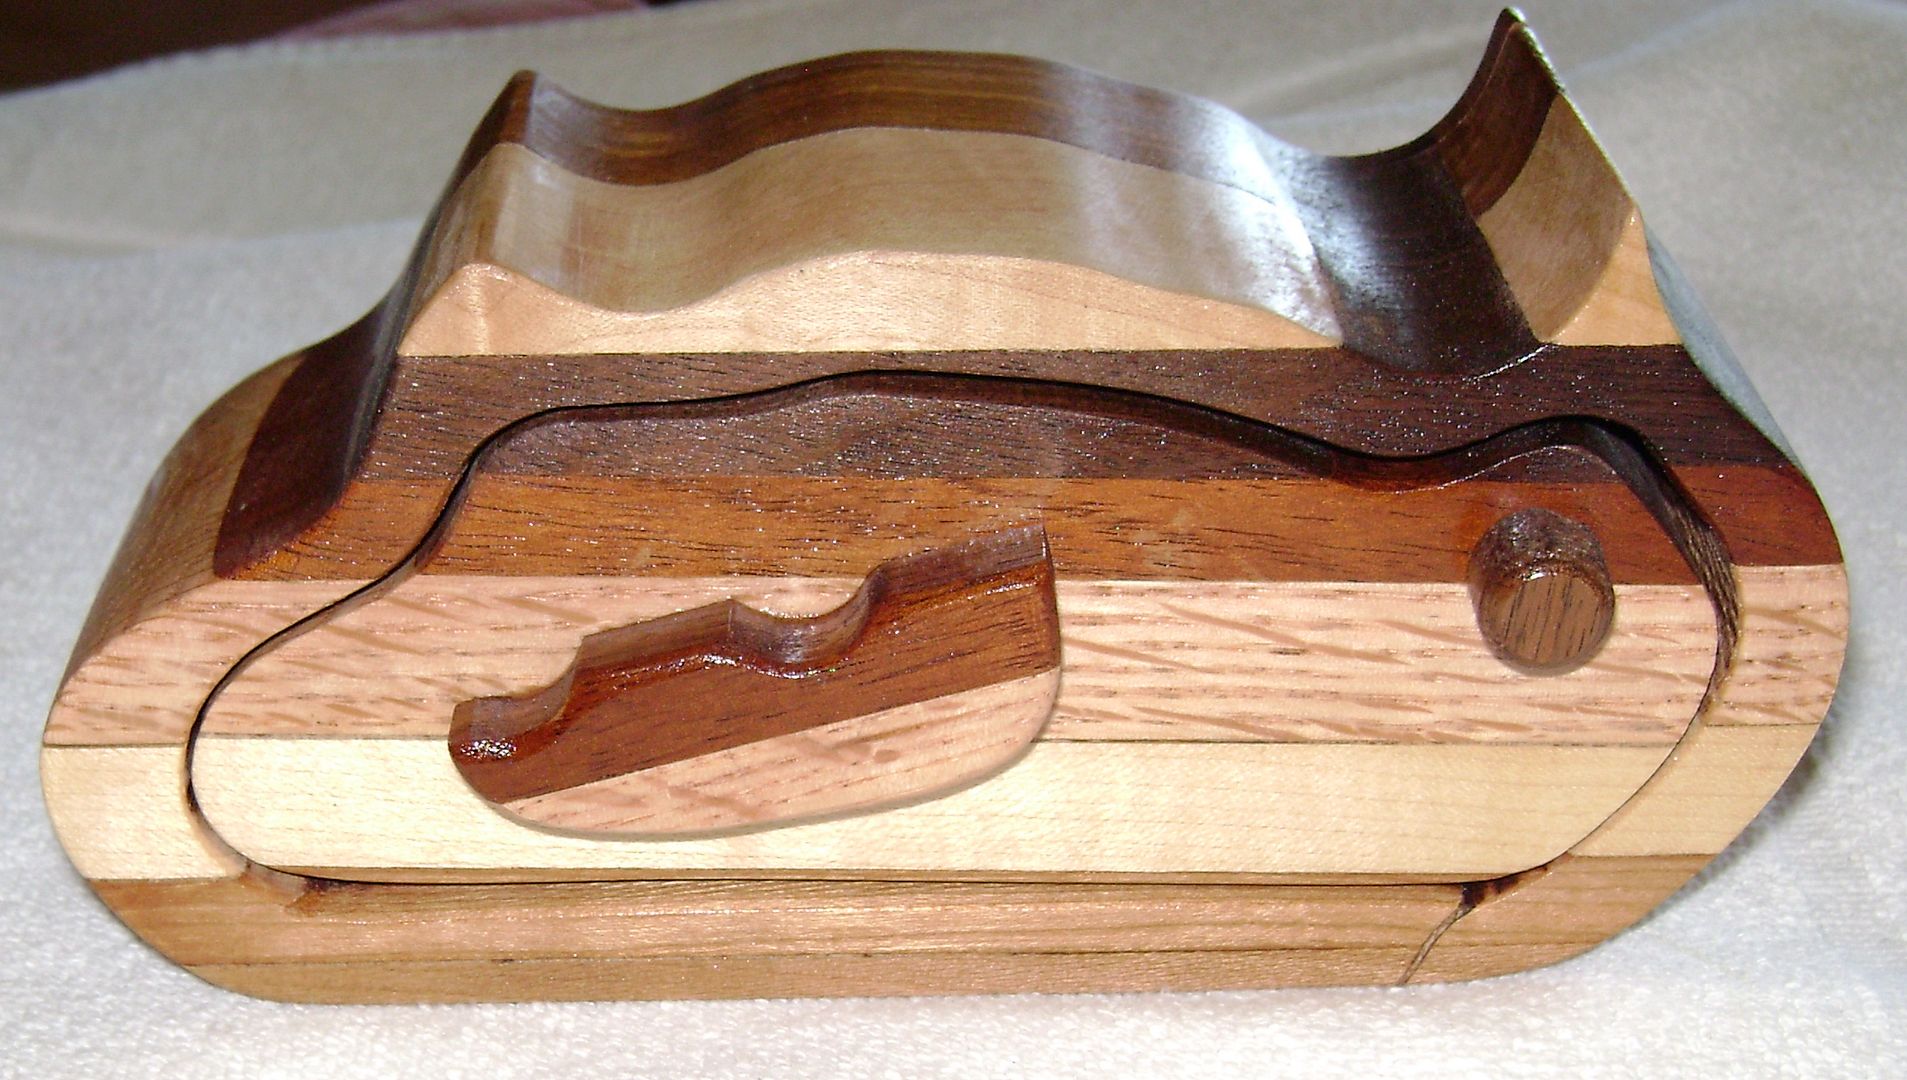
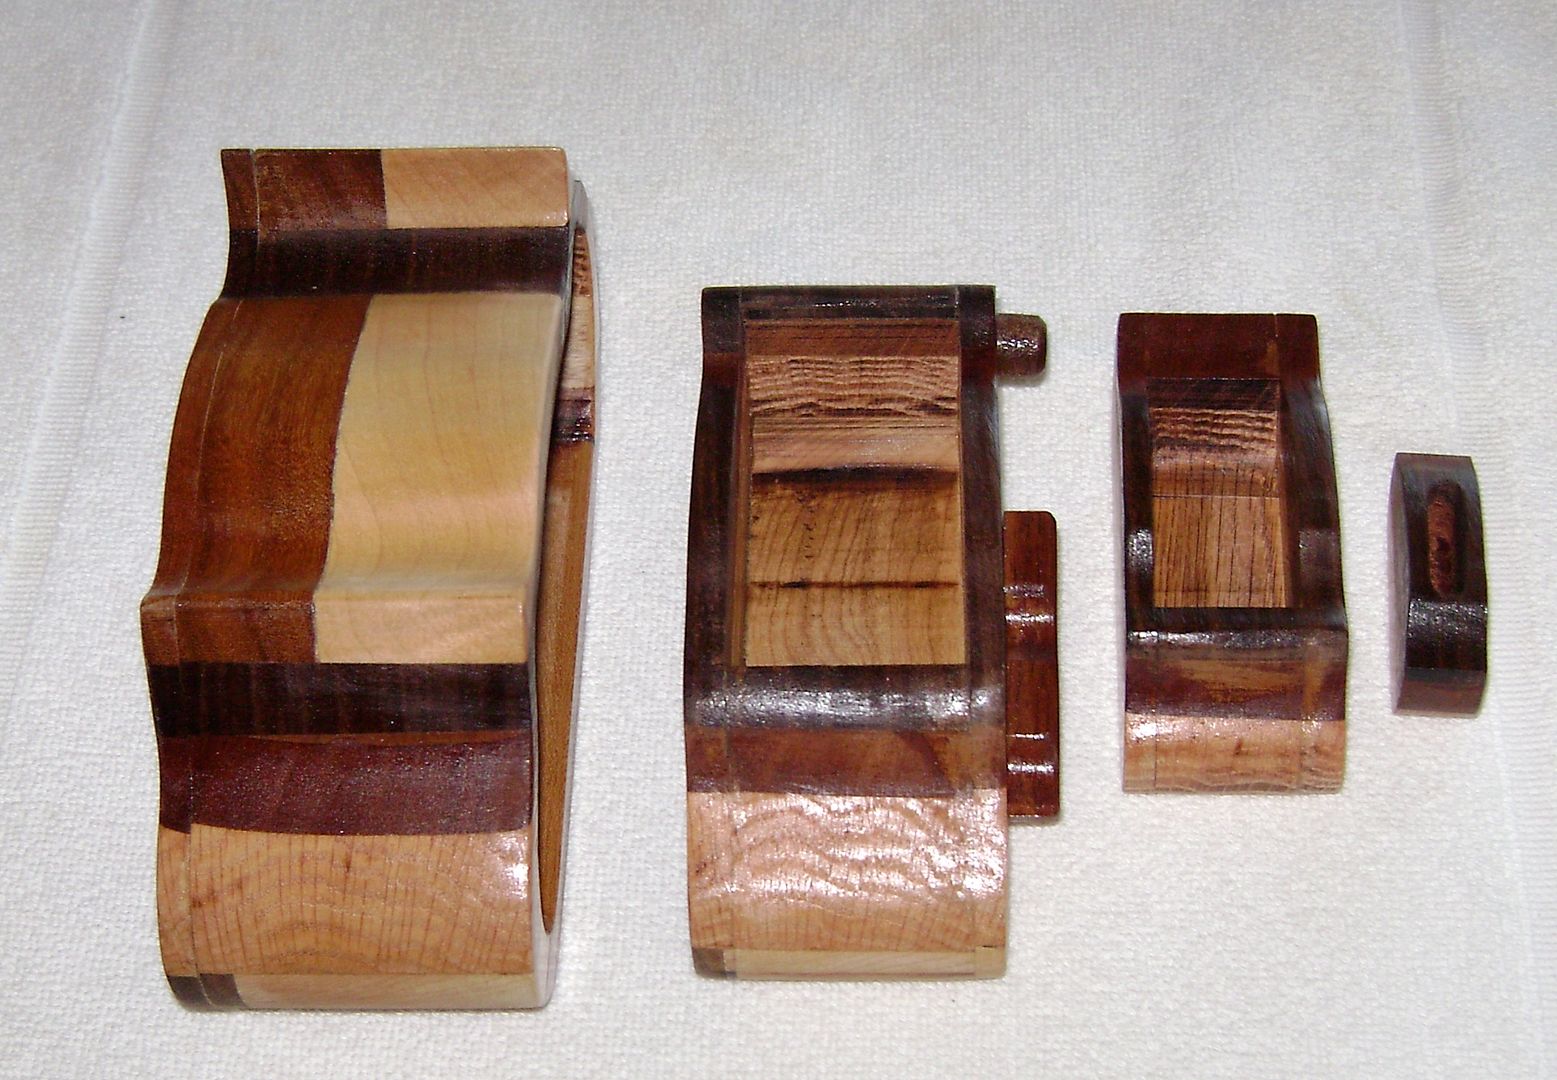
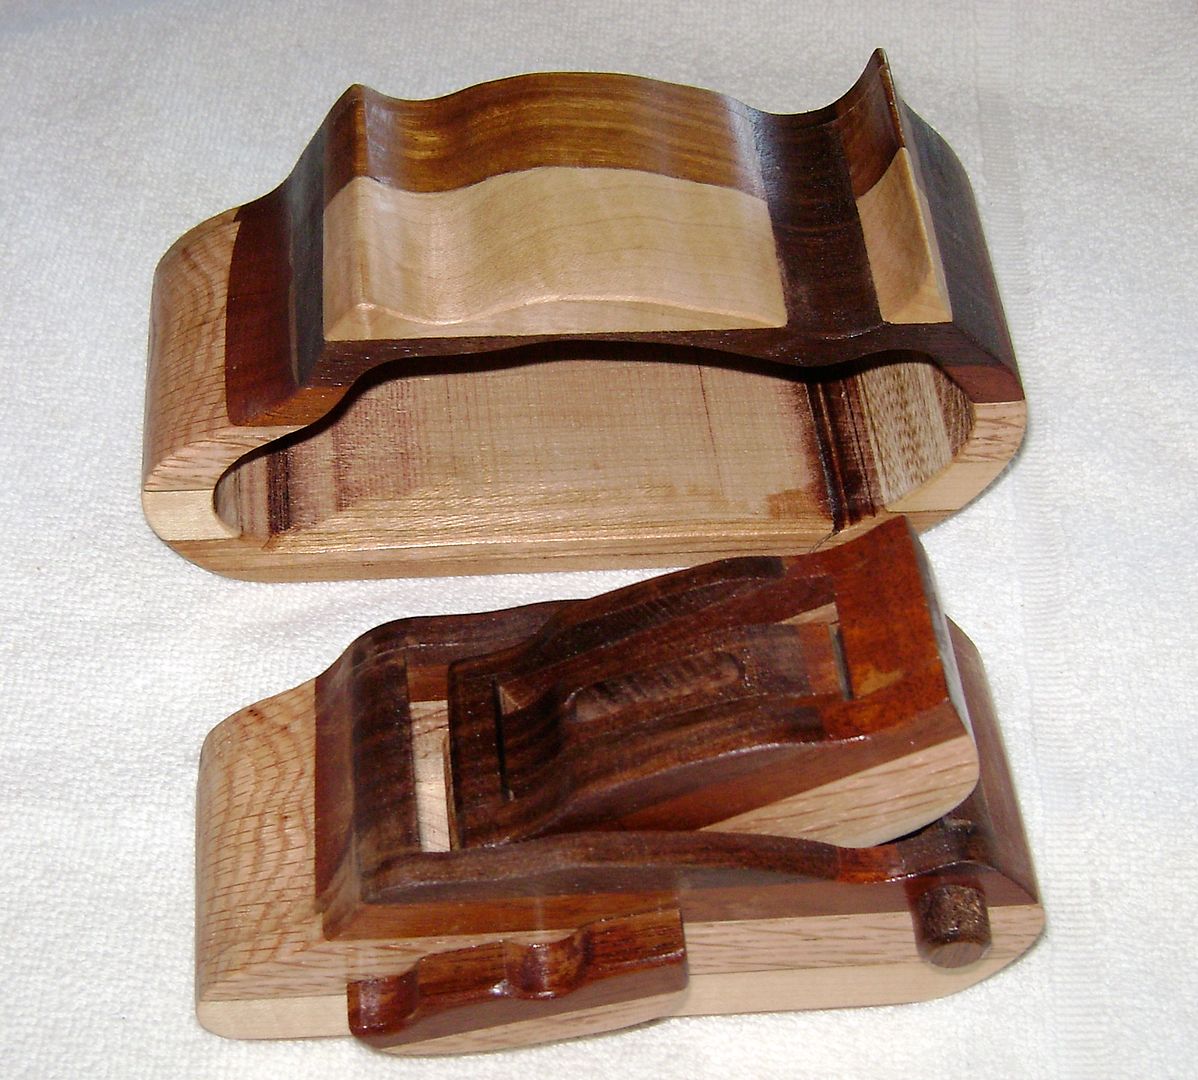
Bruce in Rossmoor decided to try his hand making his first bandsaw box. One thing led to another, and he ended up making a nesting set. Perfect, because while making it, he realized it looked like a bird. Adding the eye, was inspired. First box? Wow...more ambitious woodworking! Thanks guys.


Read More..

Wednesday, February 12, 2014

Writing Desk and Chair In Process

Were taking a break from sanding to share with you some progress photos of the writing desk and chair.

David actually told me today that he likes sanding ... I think he is the only one! 


The desk is coming along ... the top has been completely sanded, all that is left is the little crevices.

We are using the orbital sander with 80 grit sandpaper for the flat surfaces and a combination of sanding blocks and sheets of sandpaper for the rest.

I said earlier that the desk is oak (the drawers are but the top isnt) Anyone know what type of wood the top is?


The chair has been sanded and primed, now it just needs a top coat and an upholstered seat ...

Hope you are having a great weekend!


Read More..

Proposed Kitchen and Master Suite Remodel

While we were in MD for Christmas, we took measurements of the kitchen and bedroom suite at Davids parents house. The goal is to one day rework the space so that it works better for them and increases resale value.

It is pretty obvious where David got his handiness and love for home projects, his parents have home projects going on year round. Since building the house (a lot of it themselves) in the late 70s they have built two additions and expanded the outdoor living space by building two large decks off of the dining and living room.

Background info: The kitchen space is original to the house and everything right of thick wall (right of kitchen) is an addition. The addition added a garage underneath the master bedroom (house sits on a hill in case you were wondering how the garage fit). As you can see the master bedroom is much larger than the kitchen.


My goal was to enlarge the kitchen while scaling down the master bedroom and include extra storage space in both spaces.

Must haves:

1. Larger kitchen: more storage and counter space
2. Walk-in closet(s) in the master bedroom
3. Private master bath (currently accessible through the laundry hallway)

and here is my proposed plan:


Feel free to skip to the summary section below the 3D drawings if you dont want to read my long description :)

Starting from the bottom left of the floorplan.


Entering through the foyer, I moved the breakfast room table over to the wall and included built -in banquet seating. Moving the table to the wall will open up the walk way to create better circulation since the kitchen is expanding slightly into the breakfast room. To open up the kitchen and breakfast room, I removed the partial walls between the spaces.


The kitchen was expanded by removing part of the wall to the right of the kitchen. *Note: Since this is a structural wall, additional engineering will be needed. This allows room for an island and bar seating. The range was flipped to the other side of the kitchen and the sink/dishwasher remained intact (a good way to help cut down remodel costs is to keep as many plumbing lines as possible intact). The refrigerator was moved about 3 to accommodate extra space around the range. I included additional cabinets and counter space across from the refrigerator.

Moving right, there are floor to ceiling cabinets which I would propose for the pantry area (up high for seasonal item storage). The washer and dryer closet was turned parallel with the wall, which works well because the existing dryer vent can be reused. I wanted to include a larger laundry room, but compromised for a walk-in closet in the master bedroom.


I made the master bedroom slightly smaller by including a small walk-in closet, which lines up with the laundry closet. One of the must haves for Davids parents was a large walk-in closet since they currently have just two small closets. By reconfiguring the master bath and laundry hallway, I was able to fit a large walk-in closet, with access to both the bedroom and bathroom.

The current bathroom doesnt include a window (natural light in a bathroom is definitely great when possible!), so I moved the wall over and put a double vanity by the window. The shower moved forward slightly to accommodate a water closet. Ideally, I would include a linen closet in here, but since the walk-in is easily accessible from the bathroom, a section can be devoted there.


In summary, the breakfast room will be enlarged by removing the partial walls separating it from the kitchen and a built-in banquet will open up the walk way. The kitchen will be enlarged by opening up the wall to the right (additional engineering needed). The laundry closet will be flipped against the wall but remain the same size to accommodate the walk-in closets. The master bedroom was  scaled down to a more comfortable scale, but there is still plenty of room for furniture and even a small sitting area.

I was able to fit everything on the wish list with very little compromise! I think that these changes would make the space much more functional for Davids parents and hopefully help with the resale value if they decide to sell (who doesnt look for a larger kitchen and walk-in closets when buying a house??)


Weve been talking about reconfiguring Davids parents master bedroom to include walk-in closets and expanding the kitchen for a few years now, so it feels great to have a plan in place! Of course, there will be changes and tweaks along the way, but this is a good place to start! His parents just finished enclosing a porch to a rec room, so maybe we can convince them to start on this in the near future? Realistically, it will be a least a year until they start, but Ill keep you updated on any progress!


If you are interested in any of my design services, feel free to contact me at sarah.m.dorsey@gmail dot com


Read More..

Tuesday, February 11, 2014

Upsizing and Supplementing

...the equipment acquisition marches on.

I finally replaced my third-hand drill press.  My old drill press was better than no drill press at all, but thats about all I can say about it.  It was pretty small and not very powerful.  I finally managed to save up enough allowance to upgrade to a Delta:
Its bigger, lots more powerful, and makes a nice noise when you switch it on.  Check, check, and check: sounds a like a good power tool.

Little Drill Press looks up jealously at the new king of the hill:
(Yeah, the garage is a mess)

Ive been sawing up a lot of firewood recently:
Anyone need a drawer? If you need a custom drawer, by Golly, Im your man. Lemme know. Seriously.

For a while Ive been wanting a little joinery bench.  Your typical woodworking bench is optimized for planing.  The height is set at about belt-high so that one can use his or her body weight when working a bench plane.  My bench works great for that...not so much for finer operations like dovetailing.  Also, the vises are not great for holding end-grain upright.  So despite my already serious space issue in the garage, Im making a joinery bench.  I didnt document the first half at all.  I have no excuse for this.

To help put the following detail photos in context, heres the almost-complete bench:


This project is being done on the cheap: southern yellow pine, of course:
Here you can see the how the bench works.  The laminated top captures the dovetailed leg tops.

The benchtop is my standard floating-tongue joinery:
My wife really likes the look of the end-grain.

With the legs alone, the bench was pretty wobbly, so I decided to brace them with a shelf.  The shelf is supported by braces that are lap-dovetailed in place.  The lapped-dovetail is one of my favorite joints: its really strong, pretty easy to make, and really useful.  I used a ton of them in fence-gate braces.

First just layout your dovetail on the end of the brace, making it the height of the width of whatever is being braced.  Then just cut it out.  I make the ends of my tails extend all the way to the corner of the stock, which is really unnecessary and makes things difficult...I should stop doing that; it turns a two step process into a four step process.  Because the cutline is right at the corner of the board, its a particularly difficult cut to start and requires (fittingly) the dovetail saw:
There are some subtleties involved in this cut that are better communicated in a video...oh well.

Then the crosscut carcass saw nips off the little bit of waste:

Then the tenon saw finishes it off:

Like I said, all this could be accomplished in two simple steps (tenon saw all the way down and then crosscut the base of the waste off) by just starting the cut elsewhere in the end-grain.  Anyhow, once the tail is cut, just lay it on the legs to the braced and mark your cut lines:
Im trying a new technique here: after marking my cut lines with a knife, I take a chisel and par out a little ditch on the waste side of the cut line.  What this does is guide the saw right up to the cut line when you are starting your cut.
Pretty good.  I know it doesnt seem difficult, but Id say being able to cut to a line accurately has got to be about 90% of the difficulty in hand tool woodworking.  Youd be astonished how difficult and frustrating it can be.  This chisel technique works really well, but takes quite a bit of time...worth it though on visible joints.

Chiseling out the waste on these lapped dovetails is really satisfying.  
Just zip it out...
...and tap it in:

I then put a thin cherry top on the braces, locking everything together with more dovetailing, and glued it up:
When I first started playing with wood, a fellow I used to work with told me to look for clamps on sale whenever I went anywhere that sold that sort of thing.  In fact there is a woodworking axiom that goes "you can never have too many clamps."  My experience has yet to contradict this.

A little cleanup, a little boiled linseed oil...
I know that the vise looks like it sags; it squares up when you tighten it.

As I mentioned, its not quite finished yet.  I may raise the height with a rolling platform on castors or something like that.  Ill trial it at this height for a while and see how it works.

Hey, you know what this would be perfect for making on? 
Drawers!  Let me know.
Read More..

Saturday, February 1, 2014

Woodshop tips and tricks

Get Woodshop tips and tricks Best choice

Woodshop Tips And Tricks

Pro woodworking tips.com-woodworking tips and tricks, Woodworking tips and tricks. wood working tips can be a helpful source of information for all wood workers.. Woodworking tricks - woodworking tips and tricks to fix, Learn some woodworking tips and tricks to help solve even the trickiest of problems. while there are literally countless ideas for solving wood working problems, here. Tips & tricks | woodworking, Join one of the most active woodworking communities on the internet and interact with over 60,000 fellow woodworkers..

Woodworking tips and tricks, One man’s collection of fine woodworking experiences and wood working plans and projects gathered together in one place for your convenience. Woodworking techniques and how-to - the world's leading, Shop-tested tips from wood magazine and craftsman around the country.. Woodworking tips & tricks - newwoodworker.com llc, Woodworking how-to's, tool reviews, articles and plans note: portions of the information presented here may not apply to you, your tools or your situation..

Intarsia tips and tricks - woodmagazine.com, For scrollsawing softwoods and hardwoods up to 1" thick, judy and jerry recommend you use a no. 5 reverse skip-tooth blade (12 teeth-per-inch minimum) like the one. Cheap tricks and household tips, Washing walls: are we having fun yet? before you actually start the work of washing walls, you need to assess just how much work they actually need…and how much. Tips, tricks, & homemade jigs - woodworking talk, New posts: hot thread with new posts: no new posts: hot thread with no new posts: thread is closed.


Read More..

Friday, January 31, 2014

woodworking plans and ideas

Get woodworking plans and ideas must try

Woodworking Plans And Ideas

Woodworking plans ideas, Finding the most suitable wood plans. if you must accomplish your projects successfully, the right wood plans are very crucial items to have at your disposal.. Woodworking plans - wood magazine - the world's leading, Each of wood's step-by-step plans has been tested in our very own shop to prove the accuracy of all instructions, illustrations, and dimensions.. Binky's woodworking - how to build projects, 100's of free, Free and fee woodworking plans, how to pages for many projects. ideas, and tips for woodworkers of all skill levels. huge resource of wood working plans and services.

Furniture | woodworking plans & projects, Variety of woodworking plans with easy-to-follow 3-dimensional drawings and step-by-step instructions available for download.. Woodworking plans plans, Free woodworking plans plans ,get woodworking tips, techniques, project plans. About.com woodworking - woodworking - free woodworking, Free woodworking plans and reviews of woodworking tools and machinery, plus woodworking tips from making your own jigs to safety in the woodshop. find free plans for.

Woodworking plans online, Woodworking4home is an extremely popular source for woodworking plans online. it has 14,000 different woodworking plans that are very well organised, and easy to follow.. Free woodworking plans, furniture plans, woodworking, Free woodworking plans - build a smile. photos included in 200 categories of free woodworking plans with thousands of furniture plans, woodworking patterns and projects.. Free diy woodworking plans, projects. woodworking tools, Offers a wide variety of woodworking plans free and pay. house plans. projects for the do it yourselfer. woodworking tools. landscaping ideas. indoor and outdoor.


Read More..